Tutorial: Lists and Settings
In ShareScope you can click on Help and access a series of tutorials that give you an overview of the way the program works. This training zone article is designed to complement these tutorials but also offer more detail than they are able to.
The ShareScope List window
The ShareScope screen is split into two colour-coded halves. The blue half is always a list, the green half shows additional information usually for the selected share or the list shown in the blue half.
The blue half of the screen is made up of two components, a list of shares and a setting which determines what information is shown for that list.

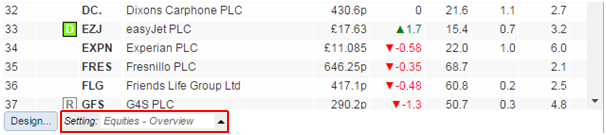
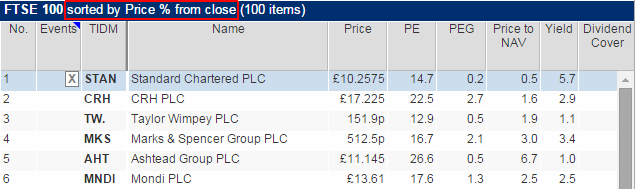
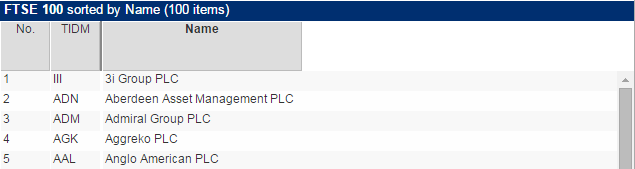
Here we can see that the list of shares is currently the FTSE 100, the list has been sorted by Name and is using the setting Equities - Overview.
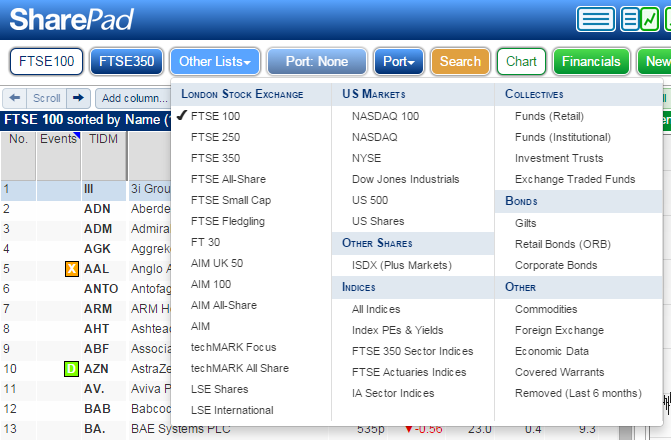
You can change the list by selecting either the FTSE 100, FTSE 350 or Other Lists buttons on the Main toolbar. A list can also be a portfolio that you have created yourself and you can select one of your portfolios using the Port button.
Sorting a list
The way a list is sorted is independent of the list of shares and the setting being used. The title of the column used to sort the list is displayed in the list title box.
To sort a list you first need to select the column via which the list will be sorted.
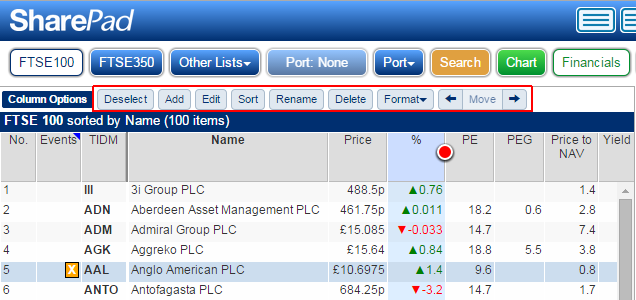
When you select the column you will see that the blue toolbar options change and you can then click on the Sort button. On a computer you can also just double left click on the column heading to sort the column. Clicking on the Sort button again or double left clicking on the column heading will reverse sort that column.
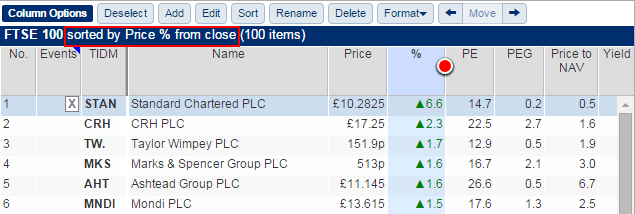
In this example you can see that we have sorted the list by the Price % from close column, which has the column heading %.
If we were to change the setting or delete the Price % from close column, as we have in the following example, the table would still be sorted in that way.
Changing the setting
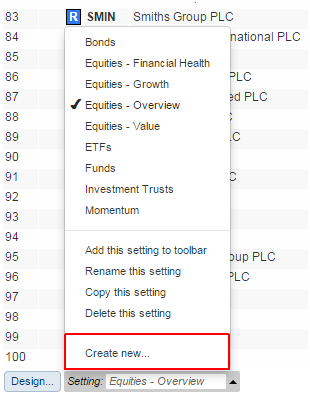
By default, different lists use a different setting. For example, lists of shares use the Equities - Overview setting.

If you click on this at the bottom of the screen then you can select a different setting with which to view the current list.
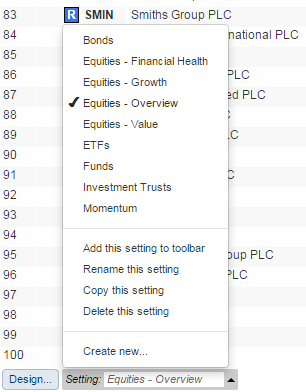
You can see that we have provided ShareScope with 9 default table settings; Bonds, Equities - Financial Health, Equities - Growth, Equities - Overview, Equities - Value, ETFs, Funds, Investment Trusts and Momentum.
The Bonds, ETFs, Funds and Investment Trusts are all designed to be used with the appropriate lists.
The Equities settings are designed for use with any one of the shares lists like the FTSE 100 or U.S. 500.
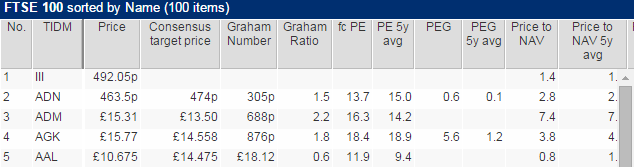
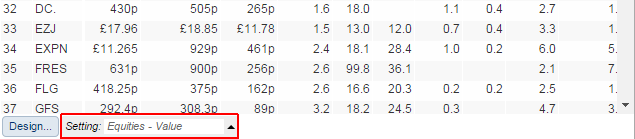
Here you can see we have selected the Equities - Value setting and we now have different set of columns to when we had the Equities - Overview setting selected.
Creating a new setting
While it is possible to customise any of the default settings it is also possible to create your own settings. To do this click on the Create new... option on the Setting menu.
You will be asked to give the new setting a name. In this example we have called the new setting My table.
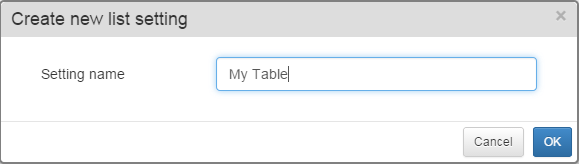
When a new setting is created it already has three default columns: No. , TIDM and Name.
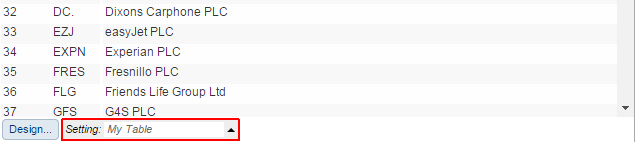
You can also see that your setting has become the selected setting on the Setting menu at the bottom of the screen.
Copying a setting
Rather than make a brand new setting it is possible to copy an existing setting which you can then modify as required.
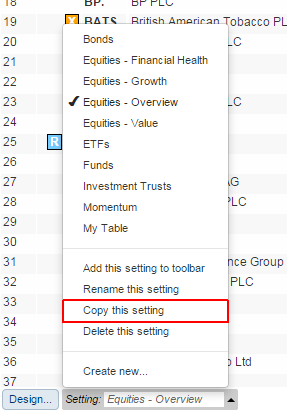
To copy a setting select the setting you wish to copy first and then select the Copy this setting... option from the Setting menu.
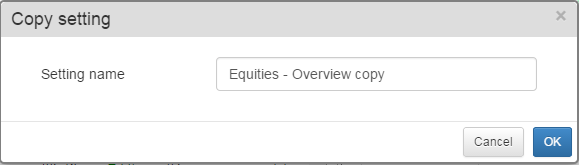
You will be asked to give the new setting a name. In the above example we have chosen to copy the Equities - Overview setting and you can see the name is currently shown with copy appended to the end of it.
Deleting and renaming a setting
If you have created a setting that you no longer use or maybe you have copied a setting and forgotten to change the name then you can either Rename the setting or Delete the setting.
Both of these options are available via the Setting menu. Note: make sure the setting you wish to delete or rename is the currently selected setting, i.e. it has a tick beside it in the menu.
Adding a setting to the toolbar
If you have one or more settings that you use more frequently than the others then you have the option to add buttons to the Settings toolbar for them.
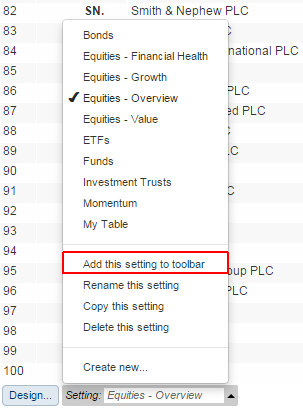
Again make sure you have the correct setting selected and then click on Add this setting to toolbar on the settings menu.

A button will be added to the toolbar that will allow you to select the setting with a single click. The number of buttons that you can see on the toolbar is dictated by both the size and orientation of your screen and also how you have the divider between the blue and green sides of the ShareScope screen set.